This is the second and last post about a DBMM tournament I entered, The Winter Cup. The first part can be found in a previous post.
Day two of the Winter Cup was upon us! There were two more entries just for the second day which brought the total up to 16, a huge number. Coupled with a Hordes launch event it saw a jam-packed club meeting.
Game three
After my two timeouts on the first day I was left in the middle of the table and was drawn against John van den Hoeven and his Trojan army. I’ve known John for a long time, since I got into 15mm DBR back when that was still a thing, and have always enjoyed playing him – he’s great fun and always has wonderful looking armies! His Trojans were no deviation from his usual and they took home the Best Army award against some stiff competition.
John’s Trojan army was a pretty good opponent for my Seleucids – his heavy foot was of a lower quality to mine so I was likely to win any slog in the centre, though his large numbers of light chariots and Hittite swordsmen did pose a threat. Luckily I invaded so he was forced to deploy first, giving me the line-up advantage.
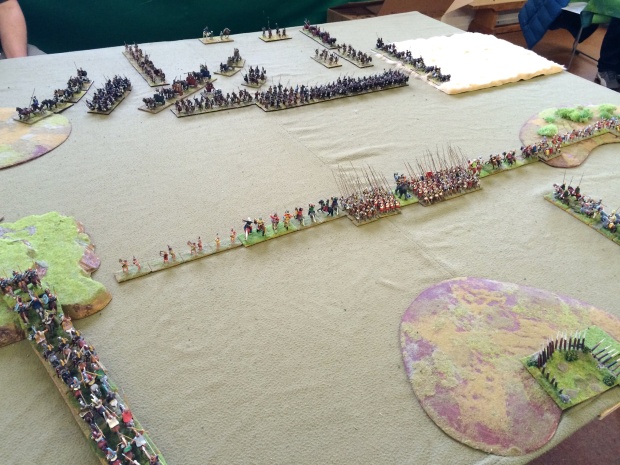
He deployed in a box formation against an expected flank march. Great pip dice in the first turn allowed plenty of redeploying, so his Hittite shock chariots exploded out of the box to head off my line cavalry that was attempting an outflanking manoeuvre. The foot plodded up in the face of my phalanx.
I saw an opportunity to position my companion cavalry against his Hittite foot, so sent their column off behind my phalanx. I abandoned my planned outflanking with the line cavalry, so just sent up a couple to stop his march moves and repositioned the rest in the centre, eyeing up his Hittite chariots. I knew that the match-up was far from ideal but I did outnumber them considerably.
John then proceeded to roll terrible pip dice for his Trojan commands, meaning that his left flank stalled and his Hittite ally had to do all the work.
The Hittite foot ended up making first contact with the companion cavalry and started to lose elements right away. The Trojan foot fared a little better against the phalanx, however they were working their way around the flank so would have probably got the better of the pikemen in a few turns. The real tragedy for John occurred when he sent his shock chariots into my line cavalry and had one die to a 4-1 – this left his general exposed who was then flanked and taken out next turn. That, coupled with the losses of the foot, was enough to break the command and make the game a foregone conclusion.
Lessons
There wasn’t a lot to be gleaned from this game unfortunately, my wildly good luck and John’s poor luck meant it was a bit of a lop-sided encounter. A few things though:
- Try to plan for low pips during the next bound. John got stuck with about three turns in a row of poor pips which of course is hardly something you can plan for, but I can see that making sure that you’re not over-extended after a bound of high pips is quite important.
- When going in to a potentially risky engagement, keeping some troops behind the line in case of a bad 4-1 or 6-2 roll could keep disaster at bay.
- Pike blocks certainly devour most other spear-armed foot as long as you keep the flanks intact.
Game Four
My good result from the third game catapulted me into fourth place, so I was facing off against Mark Pickup and his Late Imperial Romans on the second table. Pretty stoked to achieve that in my first DBMM tournament!
I was pretty sure it was going to be a tough game. I assumed that I’d be seeing foederati warbands as well as legionaries, so my phalanx would be tested more than usual. What I wasn’t counting on were the cart-mounted ballistae! More on them later.
I defended so was forced to deploy first. This led to my phalanx being directly opposite some warband, as I expected. My cavalry on the left flank was faced with knights, cavalry and light horse, and my companion cavalry and Greek peltasts were opposite the superior Roman auxilia and a smattering of knights.
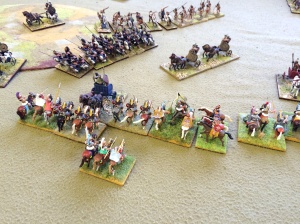
Mark also had three ballistae mounted on carts, one on each flank. I hadn’t faced these before so was looking forward to seeing how they worked. Turns out they can shoot over the heads of friendly troops! I was petrified of them but really they’re mostly just a pip-sink, as I was constantly forced to move recoiled elements back into position. However they did slow down my phalanx as I hadn’t screened it with skirmishers, so had to move pike elements in front of the vulnerable elephant. I ended up losing three elements in the run-up to the warband which proved very costly: without the fourth rank on three of my files it meant that I wasn’t able to destroy any warband during my turn. This mean that the warband was able to absolutely annihilate my phalanx!
The other flanks didn’t fare any better – my cavalry did surprisingly well against the knights to begin with, but soon the worm turned and I ended up getting a gap exploited and a few flanks turned. The peltasts lost an element to the artillery and then the auxilia closed and was able to easily dispatch them with help from his light horse on the outside flank.
My one compensation was killing the warband general!
Lessons
- Screen the phalanx! I’ll be looking again at my Macedonian list to put some skirmishers in with the pezhetairoi. I can see now that they’re vital to protecting them from ranged combat as they advance, and against other skirmishers (such as in my first game again Vince’s Thracians).
- Artillery ain’t that bad, mainly a nuisance pip-sink. However its high factor does create the potential for losses with every roll. Plus slowing down an advance can be great.
- Warbands are scary for heavy foot! That first turn can be hairy – if they win a few combats then they’re set for taking out the rest of the file, plus creating the overlap for the adjacent combats.
- I need to deploy in a better way when defending. I should be making advantage of getting the first turn with a totally regular army – if I’d set up a screen of light troops in the centre and then redeploy my phalanx against the knights and the companions against the warband, that would have been a much better move.
Closing
So in the final tally Mark, my opponent from the last round, took out the top spot. Peter Noble came second with Ptolemaic (go Team Successor!) and Gary Lewis came third with Tudor English. I finished eighth out of sixteen.
I really enjoyed all four of my games and am looking forward to getting my own army on the table as soon as possible. There’s a real depth to the local player base which is awesome – plenty of great opponents to learn from and great games in the future.
And of course as soon as I got home I started flicking through the army list books and painting my own army. Without a single element painted I’m already planning how to extend the army… Lysimachid is looking pretty good!


Enjoyed the Winter Cup report Rob. Nice to see you making it back to Ancients.
LikeLike